Friday, January 30, 2009

One of Laura's many favorites: (GARLIC AND OREGANO POTATO CHIPS)

I suppose the term "favorite" implies preferring one thing above all other items. I suppose, again, I have slaughtered the true meaning of yet another word. Well, I love a lot of things: potato chips, garlic, fresh herbs, tator tots (I'm starchy ehh?), Bearnaise sauce, most anything grilled, huge green salads (whew, there's something healthy), balsamic vinegar, chocolate, herbal teas, kittens, warm weather, the smell of a fresh plowed field, sunrises, sunsets.....I could go on forever and it's probably very boring to anyone else. So to get back on track, and while I was thinking of Superbowl Sunday, I had remembered my garlic and herb potato chips that I had made a while back for my son's Birthday. They're so easy it's illegal and everyone will scarf them up to be sure. Well, we did anyway.

I can't remember where I had originally seen this idea but I took the premise and ran with it. It's unhealthy but out-of-this-world addictive to eat.

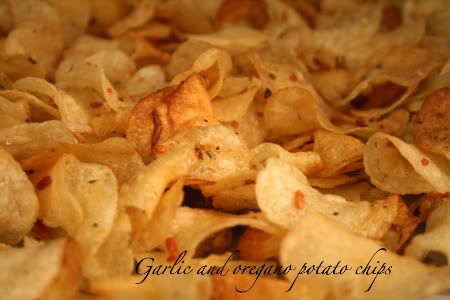
You can use any herb you prefer or have on hand. I used fresh chopped oregano from my garden. The potato chips are also a preference but I ALWAYS use kettle chips.

Garlic and oregano potato chips:

Ingredients:

1 regular sized bag of potato chips (kettle chips are the best)
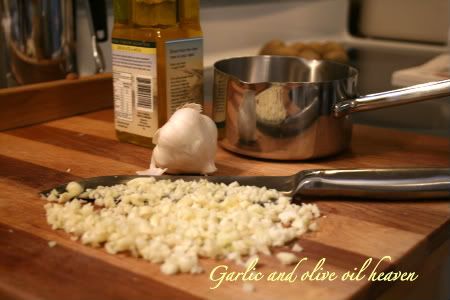
1/2 cup olive oil
1/4 to 1/3 cup fresh garlic, chopped
2 tablespoons fresh herbs, chopped
Sea salt
Fresh cracked pepper

Directions:

1. Preheat your oven to 350 degrees.

2. Empty the bag of chips into a large sized bowl big enough to be able to stir all the ingredients together without overflow.

3. In a medium-sized saucepan heat the olive oil and the garlic together and bring both up to a medium heat without sizzling the garlic but enough to season the oil. Heat for 2-3 minutes watching constantly.

4. Remove the oil and garlic from the heat and allow to cool slightly. You're only shooting for a garlic seasoned oil. Add your herbs.

5. Keeping a wooden spoon ready, add the garlic-oil-herbs to the chips and stir to evenly distribute.

6. Pour the chips onto a large flat pan and make sure the chips are all evenly placed and not laying on top of each other. Place the pan of chips in the oven and bake for no longer than 5-6 minutes, watching carefully.

7. After removing the chips from the oven add the sea salt and the pepper, to taste.

8. Let cool (the chips will firm up more as they sit) and pour into a serving vessel.

9. Pig out with a great semi-dry rose wine.

Thursday, January 29, 2009

Sunken eyeballs: (JALAPENO CHEDDAR PRETZELS FOR THE BREAD MACHINE)


Soft doughy formed pretzels out of the proofer

My poor buddy Kevin arrived home from school today looking like all the cold viruses in the world had settled in his eyes. I couldn't believe the difference in him from this morning till he got home at 3 o'clock. Alright, he looked like shit to be honest. Both eyes were red and sunken and he sounded like he was speaking with his nose pinched. I was already in the process of making pretzels which I had thought would be fun and cheery after his first day back to school since the snowy-icy weather had begun. I didn't realize that I would be saddled with eight warm pretzels and no one to eat them ravenously like I had planned. He had plunked himself in bed not to emerge yet and it's already been four hours. So much for plans.


All lathered in egg wash and Kosher salt ready for the oven

My poor buddy. Having a cold is a drag and I'm unsure of what tomorrow morning will hold for him. Until then it's just me. And my blog. And my camera.

The finished product!

Jalapeno Cheddar pretzels for the bread machine

Ingredients:

7 ozs. warm water

1 tablespoon softened butter

1/2 cup shredded Cheddar cheese

1/4 cup jalapeno peppers, chopped

2 teaspoons salt

2 teaspoons sugar

1 1/4 cups white bread flour

1 cup whole wheat flour

2 tablespoons sesame seeds

1 tablespoon wheat germ

2 teaspoons active dry yeast

Directions:

1. Place ingredients in your bread machine in the order listed above OR as recommended by your machine's manufacturer.

2. Select the DOUGH cycle and press start.

3. Let the dough run through it's cycle and watch for excessive dryness or wetness depending on the conditions in your kitchen. Correct accordingly with water or flour.

4. After the cycle is finished (usually 90 minutes or so) pull the dough onto a lightly floured board/surface and, without too much manhandling, cut into eight even balls.

5. Roll the balls into long logs and twist into pretzel shapes. Place on lightly greased pan and cover lightly with greased plastic wrap to prevent sticking.

6. Let rise (I sometimes use the dryer...no laughing, or the oven with a steaming pan of water underneath the tray) for approximately 30-40 minutes. Not too long or they'll get overswollen.

7. After the rise, lightly brush with an egg wash, cover with pretzel salt (all I had was Kosher) and bake in a pre-heated 350 degree oven for approximately 15-16 minutes and no longer than 20 minutes.

Wednesday, January 28, 2009

Curry in the afternoon

It's cold here. VERY cold. We here in Maryland got some freezing rain last night on top of the snow we received the day before. I prefer the snow and can do without the frozen crust on top. I crunched through the front yard to get some pictures of our poor pine trees and froze my behind (ass) off. Kevin's restless and wants to break free from our comfy warm home to hang out with some friends and I myself feel the urge to do something as well. My cure from restlessness was answered in the form of Cathy who suggested we make a yummy curry for lunch today at her house. I've got the list made, need to brush the fangs, and out the door I go, with camera in hand!

Tuesday, January 27, 2009

Snowy day fun: (CHICKPEA FLOUR PIZZA)

For some reason unknown to me I purchased chickpea flour in the organic section of the grocery store recently. I had no clue what to do with it until I started messing around on Recipezaar. I found a recipe for chickpea flour pizza and decided to monkey around with the ingredients. Chickpea flour on it's own tastes like crap. I seriously thought I had made a major mistake buying it. After it was mixed with other ingredients and cooked it redeems itself though. With this recipe you will definately need an ovenworthy skillet/pan to finish the pizza under the broiler. I used my cast iron skillet which worked wonderfully. I didn't stick to the original recipe and forged one on my own with ingredients that I had on hand. The chickpea batter is fodder for whatever you may want to put into it. I don't think you can make any mistakes with it. This recipe is for 2 pizza's which was certainly needed for a young hungry boy sitting inside on a snow day.

Chickpea flour pizza:

Ingredients:

1 1/3 cup chickpea flour
1/2 teaspoon salt
1 cup water
1/2 tablespoon dried oregano
1 teaspoon garlic powder
olive oil

Directions:

1. Sift chickpea flour and salt together over a medium bowl.

2. Add the water and stir with a whisk to prevent clumps.

3. Let the batter rest for 30 minutes and preheat your oven's broiler; set the rack on the lower third of the oven.

4. After 30 minutes stir in the oregano and garlic powder into batter.

5. Heat your oven-worthy pan on medium-high on the stove and cover the bottom well with the olive oil.


6. Ladle some batter into the pan and swirl to cover all sides evenly.

7. Let cook until the batter bubbles and the sides are beginning to brown. At this point I swirl some hoagie oil over the top and crack some fresh pepper over the oil.


8. Using whatever topping you desire place these on top of the cooked batter but don't overcrowd. I used blue cheese, genoa salami, and thin sliced red onion.

9. Place the "pizza" under the broiler and cook until the toppings are bubbly.